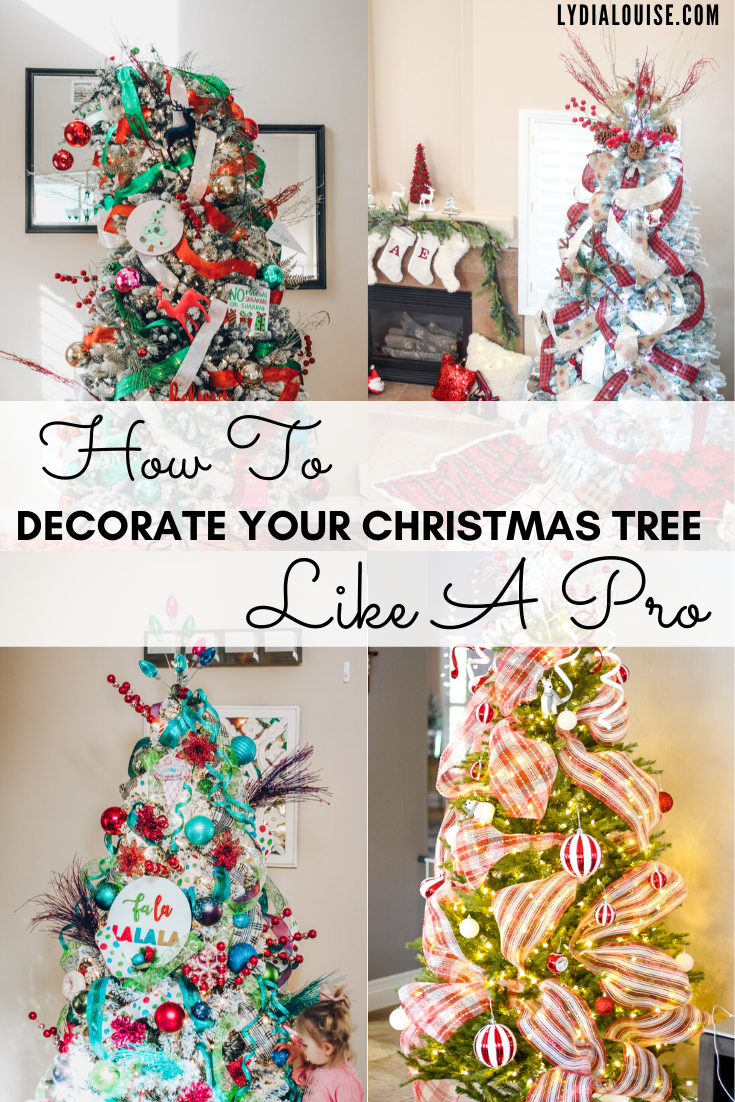
Everyone has their holiday, and mine is definitely Christmas…I actually have had a few friends over to “shop” my Christmas decoration collection because I have so much stuff! The thing is, every year I get the inspiration to go with a totally different theme than the year before…and the year before that… So I end up purchasing and creating a whole new collection of Christmas decor to go with the new theme. This year I was able to avoid that all together because I had enough to go with any theme I could possible dream of.
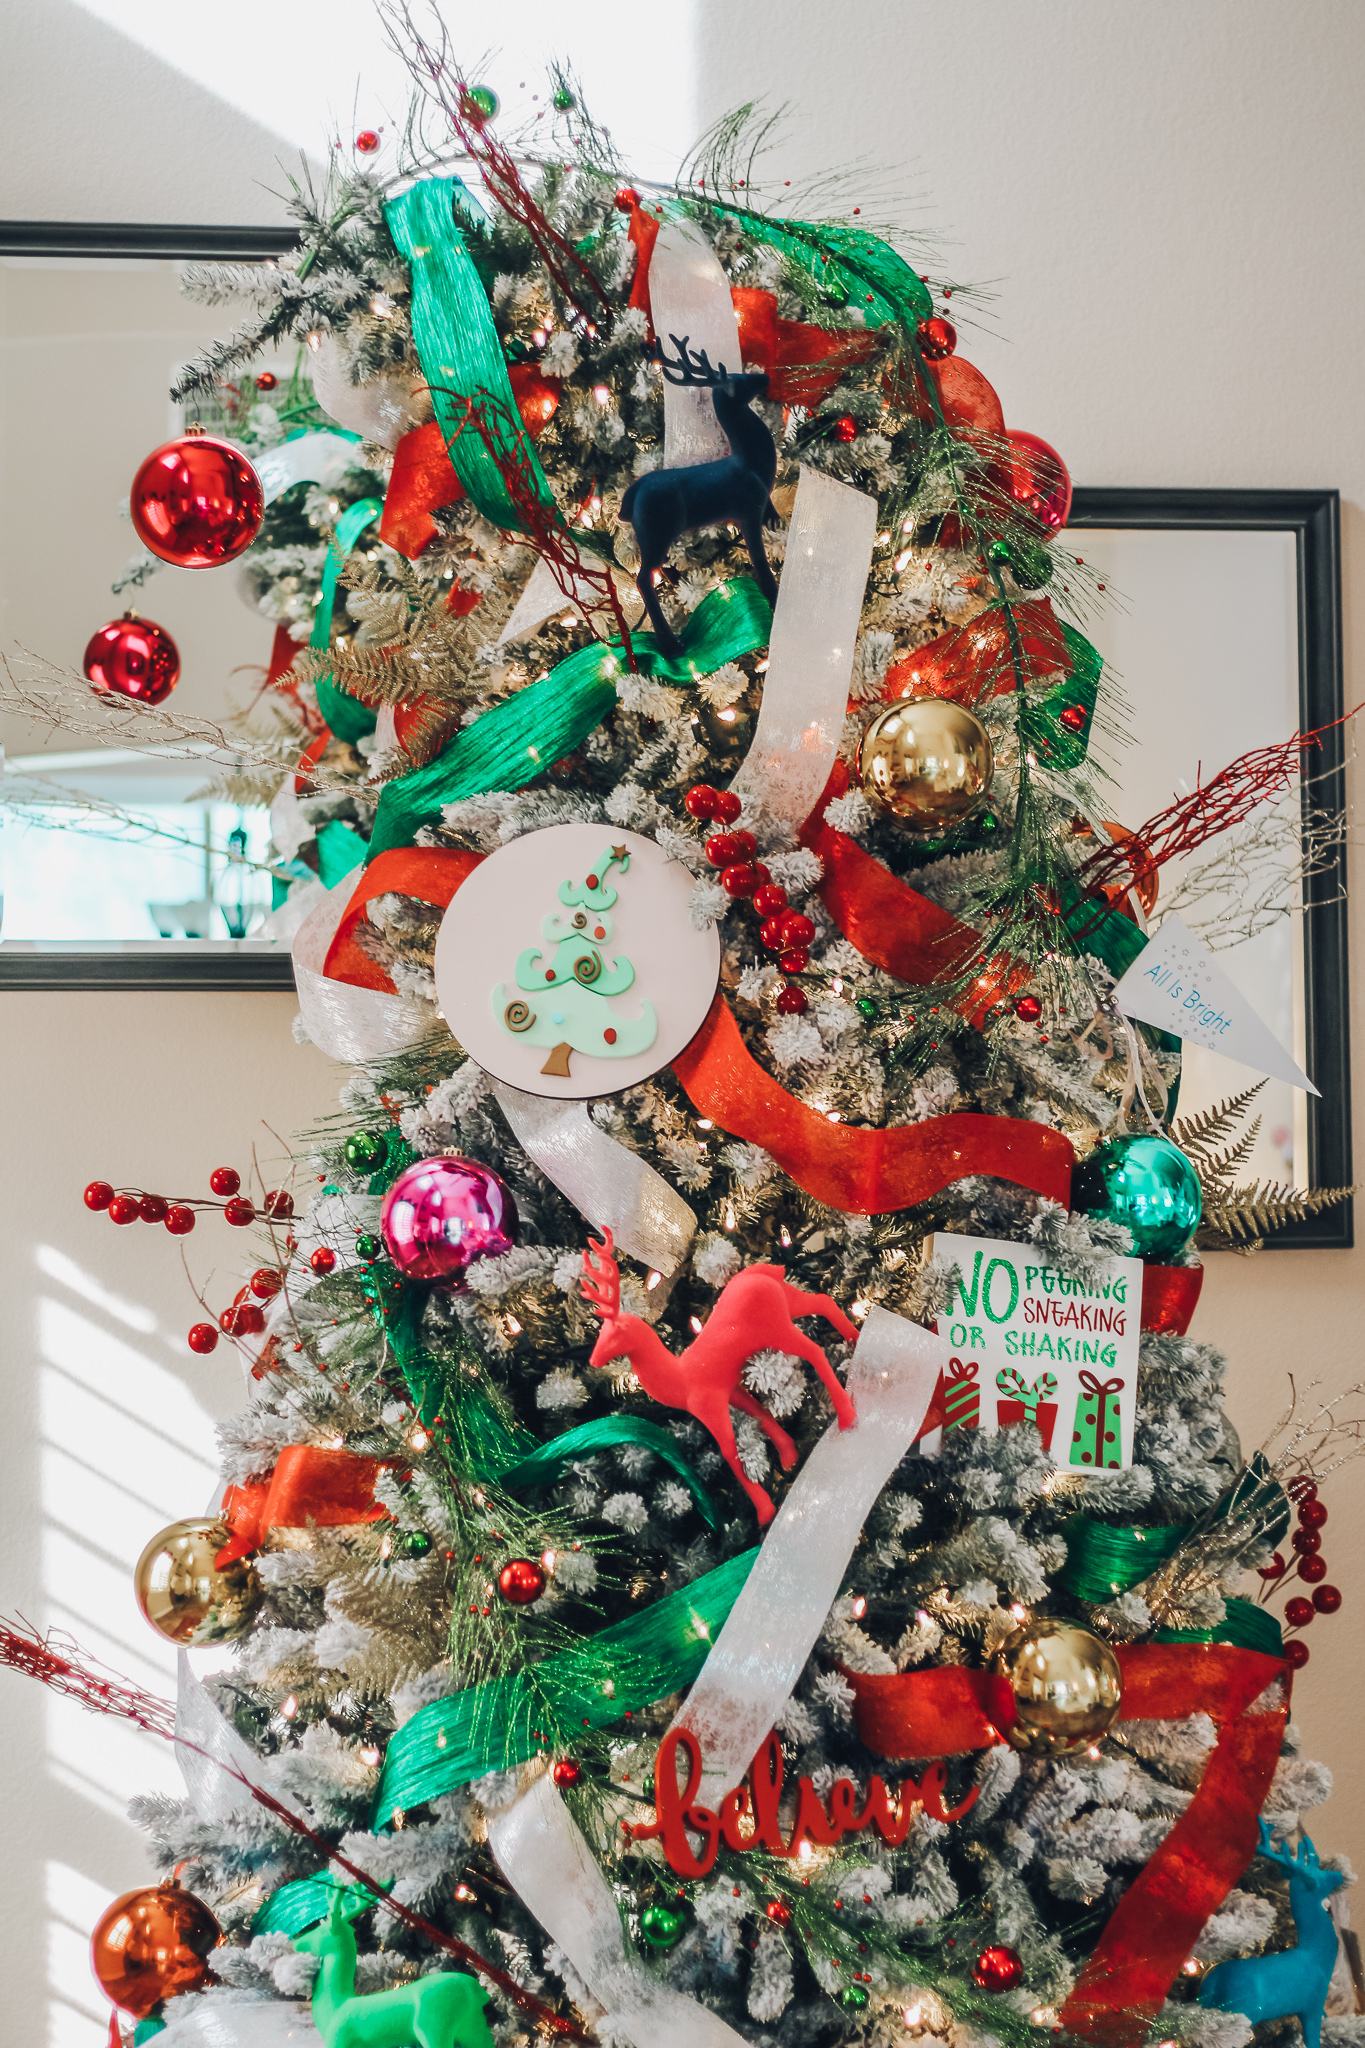
The idea for this years Whoville Theme came from the fact that over half of our home has been taken over by the girls and their toys! Nothing is really cohesive or one same color scheme, so going with a whimsical and colorful theme seemed only right! Decorating has been SO much fun already and I still have a long way to go. Christmas tree decorating has become a favorite of mine and I get asked a lot to give tips on how I do it. I even have friends and family members who will have me come over to do their trees! SO, today I am sharing a couple of our Christmas trees this year, and break down how I did them.

A fun amount of items I used this year were either from smalls shops or DIY’d by yours truly. I have been into crafting and creating a lot of my decor this year and I plan to do a whole post on all my DIY’s very soon too, so stay tuned for that! But before I dive into the small shop and DIY contributions, the place to start at is the ribbon.
Pro Tip – Get a pre-lit artificial tree. You will save yourself the work of stringing lights into the tree and taking the time to make sure they are spaced out evenly. An artificial tree does not have to be watered and will not dry out and turn brown on you. You also can use it every year without having to spend $300-$700 a year on a new real tree.
All of my ribbon came from Micheal’s and Hobby Lobby. I recommend wire edge ribbon and the wider the better. My biggest tip is to cut the ribbon into 2-3 ft strips and tuck each end into the tree in a arch. This will give the affect that the ribbon is actually woven throughout the tree without actually having to do that. It looks beautiful and helps to give the tree fullness. I will put on all my ribbon first before adding any decorations.
After I get all the ribbon in place I go in with large statement pieces. I like to use signs, large animals, branches, and sprigs. I got the two circle signs from a favorite small shop of mine @findingfoley she is SO talented and provides a wide variety of beautiful holiday signs that can be used to decorate any part of your home! I may have three of them… The large reindeer I used, as well as the other signs, are things I found at Target, Hobby Lobby, and Micheal’s.


Now that the ribbon and large statement pieces are in place, it is time to fill in empty spots with large ornaments. I LOVE using giant bulb ornaments because it helps me see a balance with the tree and I can even out empty spaces evenly. From there it is really easy to stand back and know exactly what needs to be filled in or color balanced to finish the tree off.

Now you can take your smaller ornaments and fill everything else in. I love to add fun pieces at this time and then put on the tree topper. If you want to see other (totally different) tree designs I have done check out this blog post from previous years.
